
If you write blog posts on WordPress, the slow part is rarely the writing — it is the click-through. Open the post, scroll to the Yoast meta box, type the meta description, the focus keyword, the additional keyphrases, the SEO title. Save. Repeat for every post. This Code Snippets WordPress tutorial fixes that bottleneck. With one PHP snippet installed safely via the Code Snippets plugin, you expose every Yoast field over the REST API and write them all in a single POST request from Python or Claude.
Quick summary
The Code Snippets plugin runs custom PHP without ever touching functions.php — and auto-deactivates anything that errors. Drop in a 22-line register_post_meta snippet and the Yoast meta description, focus keyword, additional keyphrases, and SEO title become REST-writable. Total setup: about 15 minutes.
In this post
- Why Yoast becomes a bottleneck when you scale content
- What is the Code Snippets plugin?
- Why not just edit functions.php?
- Step 1 — Install the Code Snippets plugin
- Step 2 — Add a new PHP snippet
- Step 3 — Paste the Yoast meta REST snippet
- Test it — write Yoast SEO meta in one POST
- Bonus snippet — disable hreflang on a single-language site
- When to use a child theme instead
- Frequently asked questions
- Where to go next
Why Yoast becomes a bottleneck when you scale content
Yoast SEO is a great plugin. It is also a click-heavy one. For every post, the workflow is the same: open the editor, wait for Gutenberg, scroll past the content, find the Yoast meta box, type the meta description, set the focus keyword, add up to four additional keyphrases (if you have Premium), override the SEO title if needed. Click Update.
For one post a month, that is fine. For a content cluster, an audit cleanup, or any AI-assisted writing pipeline, the click-through becomes the slowest step. The Yoast meta fields are stored in standard WordPress postmeta, so in theory you can write them via the REST API. In practice, Yoast does not register any of those fields with show_in_rest set to true, so the API silently ignores them. You write the meta description; the response says 200; the field stays empty.
The fix is one PHP snippet. Once registered, all four Yoast fields become first-class REST citizens, and you can write them in a single POST alongside the post body, the slug, the status, and the featured image. The right place to install that snippet is the Code Snippets plugin.
What is the Code Snippets plugin?
Code Snippets is a free WordPress plugin maintained by Code Snippets Pro. According to the official plugin directory, it has over one million active installs, an average rating of 4.9 stars, and has been compatible with every major WordPress release for more than a decade.
The plugin does one thing well: it lets you add PHP, HTML, CSS, or JavaScript snippets to a WordPress site without editing any theme or plugin files. Each snippet has a name, a description, a tag, and an active or inactive state. Snippets are stored in the database, so they survive theme switches and plugin updates.
The feature that matters most: validation and auto-deactivation. When you save a PHP snippet, Code Snippets parses the code first. If the PHP has a syntax error, the plugin refuses to activate it and shows the error inline. If an active snippet later throws a fatal error in production, the plugin auto-deactivates it and emails the admin. Specifically, that means a broken snippet cannot take the site down — the worst case is a single deactivated entry in the snippets list. Compared with editing functions.php directly, the safety margin is wide.
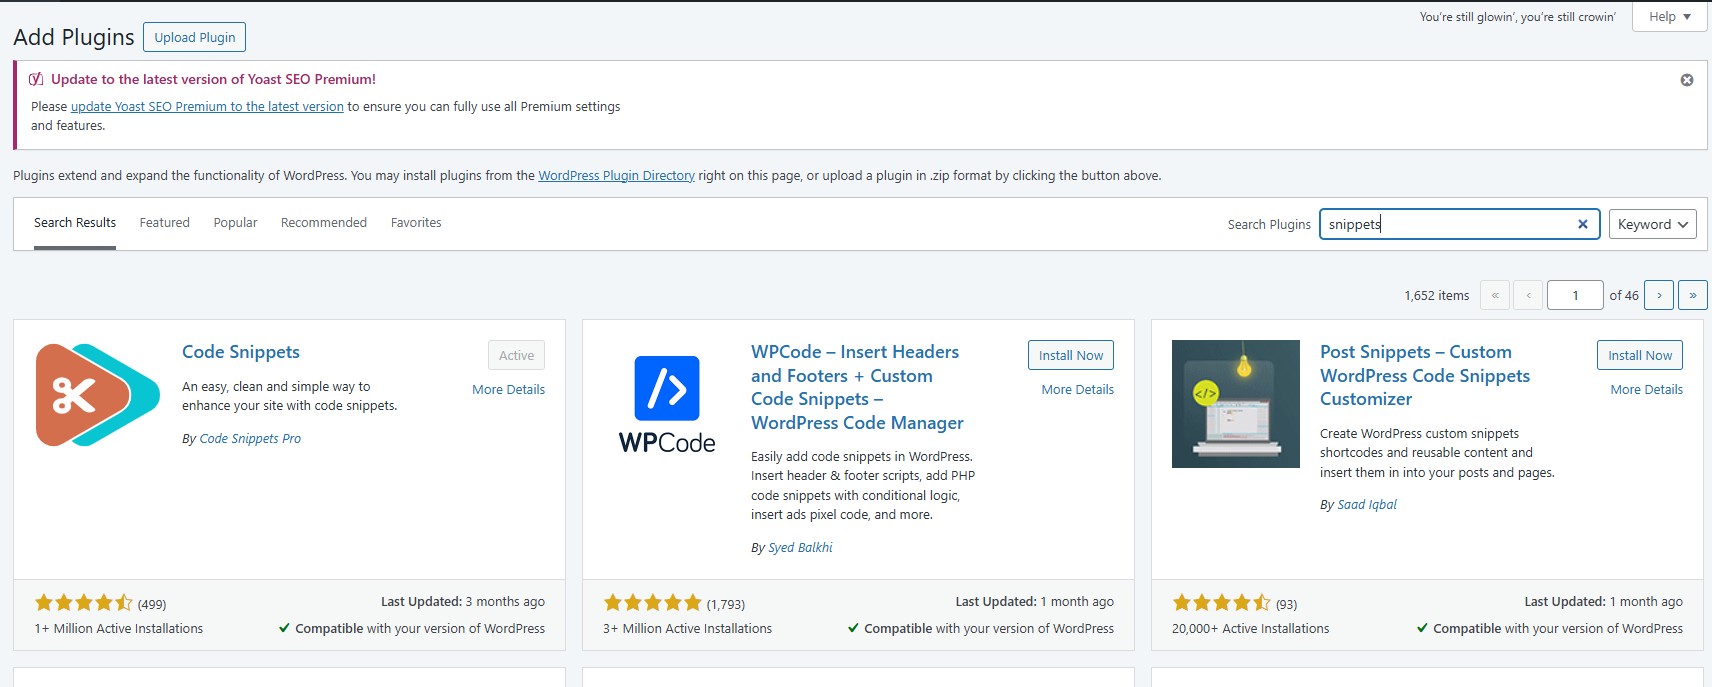
Code Snippets in the WordPress plugin directory — over one million active installs, free, and compatible with every modern WordPress release.
Why not just edit functions.php?
Three reasons most experienced WordPress developers stop editing functions.php directly on production sites:
- No error recovery. A single missing semicolon in
functions.phptakes the entire site down with a white screen. The only way to recover is to FTP in, edit the file by hand, and remove the bad line. From a phone, in a hurry, that is not a good place to be. - Theme updates wipe your changes. Code added to a parent theme’s
functions.phpis erased the next time the theme is updated. Most people learn this the hard way after spending an hour debugging why their custom hook stopped firing. - No audit trail. A theme file edited five times by three different people gives you nothing — no diff, no who, no when. Code Snippets stores each snippet as a separate database row with a name, description, and modification timestamp.
For genuine theme customisation — changing how the loop renders, overriding a template — a child theme is still the right tool. For everything else (registering meta, adding REST fields, disabling a feature, hooking into Yoast or WooCommerce), the Code Snippets plugin is safer and more maintainable.
Step 1 — Install the Code Snippets plugin
In WordPress admin, go to Plugins → Add New. Search for Code Snippets. The plugin you want is by Code Snippets Pro, with over one million active installs. Click Install Now, then Activate.
After activation, a new Snippets menu appears in the WordPress admin sidebar. That is where every snippet you add will live.
Step 2 — Add a new PHP snippet
From the Snippets menu, click Add New. The new-snippet screen has four things to fill in: a name (visible to admins only), the snippet body, an optional description, and one or more tags.
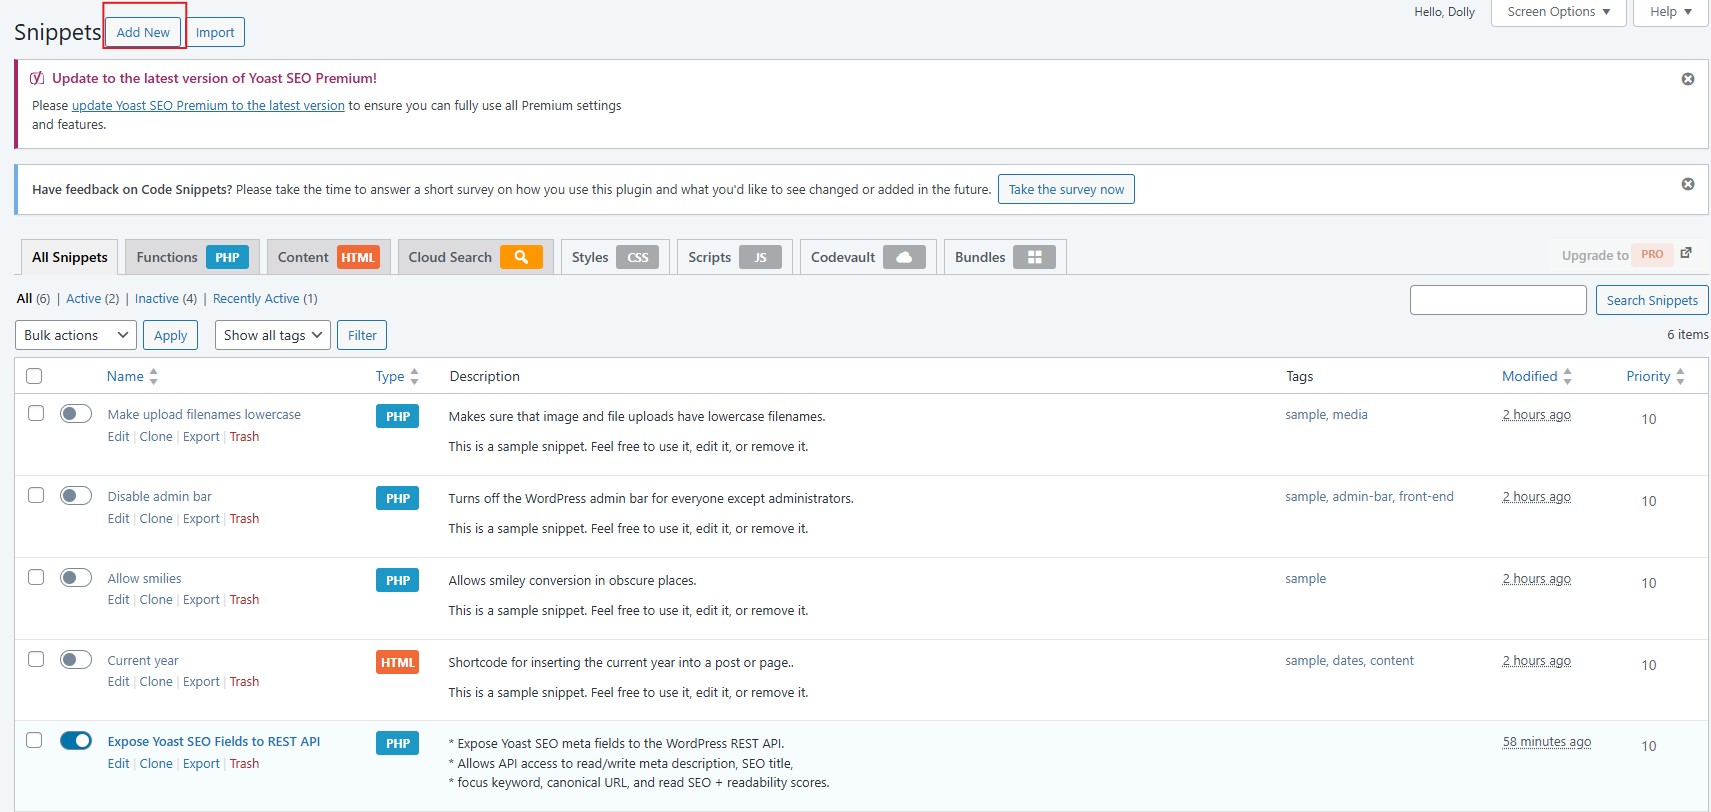
The Add New snippet screen. PHP goes in the Code field. The plugin validates the syntax before activation.
Give the snippet a clear name. Expose Yoast SEO Fields to REST API works — descriptive, easy to find later. Tag it seo or yoast so you can filter in the snippet list. The description field is optional but worth using to record the date and the reason — you will thank yourself a year from now.
Choose the run scope at the top of the page: Run snippet everywhere for most cases. Other options are admin-only, frontend-only, or run-once — none of which apply to meta-field registration.
Step 3 — Paste the Yoast meta REST snippet
Here is the full snippet. It registers four Yoast SEO meta keys with show_in_rest set to true, scoped to the post, page, and portfolio post types. Adjust the post-type list if your site uses different custom post types.
<?php
/**
 * Expose Yoast SEO meta fields to the WordPress REST API.
 * Required to write meta description, focus keyword, additional
 * keyphrases, and SEO title via /wp-json/wp/v2/posts.
 */
add_action( 'init', function () {
    $post_types = array( 'post', 'page', 'portfolio' );
    $yoast_keys = array(
        '_yoast_wpseo_metadesc',
        '_yoast_wpseo_focuskw',
        '_yoast_wpseo_focuskeywords',
        '_yoast_wpseo_title',
    );

    foreach ( $post_types as $type ) {
        foreach ( $yoast_keys as $key ) {
            register_post_meta( $type, $key, array(
                'show_in_rest'  => true,
                'single'        => true,
                'type'          => 'string',
                'auth_callback' => function () {
                    return current_user_can( 'edit_posts' );
                },
            ) );
        }
    }
}, 11 );
The Yoast meta REST snippet pasted into Code Snippets and ready to activate. Auth callback ensures only users with edit_posts can write the fields.
Click Save Changes and Activate. Code Snippets parses the PHP first, so a typo would be caught here. If the snippet activates without an error, the four Yoast meta keys are immediately exposed on the REST API for the listed post types.
A quick note on the auth_callback: it limits writes to users who can edit posts. Without it, anyone with a valid Application Password (including a low-privilege user) could overwrite Yoast meta. With it, the Application Password’s role still has to clear the edit_posts capability. Editor and Author both qualify; Subscriber does not.
Test it — write Yoast SEO meta in one POST
Once the snippet is active, the Yoast meta keys appear in the meta object on every /wp-json/wp/v2/posts/{id} response. To write them, include a meta object in a single POST. From Python with the requests library:
import requests
from requests.auth import HTTPBasicAuth

auth = HTTPBasicAuth("claude-bot", "aBcD eFgH iJkL mNoP qRsT uVwX")
headers = {"User-Agent": "Mozilla/5.0 (compatible; api-client/1.0)"}

post_id = 123
payload = {
    "status": "draft",
    "meta": {
        "_yoast_wpseo_metadesc": "Code Snippets WordPress tutorial: expose Yoast meta description and focus keyword via REST API. Write all 4 SEO fields per POST.",
        "_yoast_wpseo_focuskw": "Code Snippets WordPress tutorial",
        "_yoast_wpseo_focuskeywords": '[{"keyword":"safely add custom PHP to WordPress","score":""},{"keyword":"WordPress functions.php alternative","score":""}]',
        "_yoast_wpseo_title": "Code Snippets WordPress Tutorial: Faster Yoast SEO",
    },
}

r = requests.post(
    f"https://example.com/wp-json/wp/v2/posts/{post_id}",
    auth=auth, headers=headers, json=payload,
)
print(r.status_code, r.json().get("meta", {}))
One request, four fields written. Read the post back via GET to confirm the meta object now contains the values you sent. If you skipped the snippet, the same payload returns 200 but the meta fields silently stay empty — the most common confusion when people first try writing Yoast meta over REST.
The Yoast SEO score caveat. Yoast’s green or orange or red SEO score is computed in JavaScript on the editor screen — not on the server, and not when meta is written via REST. The score field (_yoast_wpseo_linkdex) stays empty after API writes until someone opens the post in the block editor and clicks Update once. After that single manual save, the score is persistent and shows up on the All Posts list. For an automation pipeline, the easiest workflow is to write everything via API as a draft, then open the post once to populate the score, then publish.
Bonus snippet — disable hreflang on a single-language site
If your site is single-language but the theme or an SEO plugin is still emitting hreflang tags in the head, those tags will show up as warnings in any decent site audit. The fix is one snippet:
<?php
/**
 * Disable Yoast hreflang output on a single-language WordPress site.
 */
add_filter( 'wpseo_xhtml_alternate_subject', '__return_false' );
add_filter( 'wpseo_hreflang_alternate_link', '__return_false' );
Save, activate, done. Re-run your audit; the hreflang warnings disappear. If the tags still render after that, your theme is emitting them directly outside the Yoast filters — which is a separate snippet (an output buffer that strips the tags from the rendered head). Most well-built themes respect the filters above.
When to use a child theme instead
Code Snippets is the right place for cross-cutting PHP that is not specific to your theme — meta registration, REST hooks, plugin filters, security tweaks. It is the wrong place for changes to how your theme renders. Two examples that should live in a child theme rather than Code Snippets:
- Template overrides. If you need a custom
single.php,page.php, or block template, copy the file into a child theme and edit it there. Snippets cannot replace template files. - Global style or markup changes. Adding a wrapper, changing the header markup, swapping a logo file. Those belong in the child theme’s templates and stylesheet.
The two tools are complementary. A clean self-hosted WordPress site usually has both: a child theme for theme-specific overrides, and Code Snippets for the dozen-or-so cross-cutting PHP hooks that every modern site ends up needing.
Frequently asked questions
What is the Code Snippets plugin and is it safe to use?
Code Snippets is a free WordPress plugin with over one million active installs that lets you add PHP snippets to your site without editing theme files. It is safe because it validates the PHP before activating a snippet and auto-deactivates any snippet that throws a fatal error, so a broken snippet cannot take the site down. Snippets survive theme switches and plugin updates, unlike code added directly to functions.php.
Why not just edit the WordPress functions.php file?
Editing functions.php on a live site has no error recovery. A single missing semicolon brings down the site with a white screen, and you have to FTP in to fix it. Theme functions.php also gets wiped when you update or switch the theme. Code Snippets stores snippets in the database, validates them before activation, and auto-deactivates anything that throws a fatal error. For non-theme PHP, it is the safer place.
How do I expose Yoast SEO meta fields via the WordPress REST API?
Add a register_post_meta snippet via the Code Snippets plugin that registers _yoast_wpseo_metadesc, _yoast_wpseo_focuskw, _yoast_wpseo_focuskeywords, and _yoast_wpseo_title with show_in_rest set to true and auth_callback returning current_user_can edit_posts. Once active, those fields appear in the meta object on /wp-json/wp/v2/posts and can be read and written via REST.
Does the Yoast meta snippet work for custom post types like portfolio?
Yes. Pass the custom post type slug as the first argument to register_post_meta — for example portfolio in addition to post and page. Run the registration once per post type. After that, the same Yoast meta keys are writable via REST on every registered type.
Will Code Snippets slow down my WordPress site?
No. Active snippets run as native PHP exactly like code in functions.php — there is no extra parsing layer at runtime. The plugin only touches the admin UI when you are editing snippets. Inactive snippets are not loaded at all. Performance impact is the same as adding the equivalent code directly to your theme.
What does the Yoast SEO score caveat mean for API writes?
Yoast computes the green or red SEO score on the editor screen using JavaScript, not on the server. Writes via REST update the underlying meta description, focus keyword, and additional keyphrase fields, but the score field stays empty until someone opens the post in the block editor and clicks Update once. After that the score is persistent and readable via the API.
Want to sharpen the Python and API skills behind this workflow?
DataCamp offers structured, hands-on courses in Python, REST APIs, and WordPress automation patterns — built for practitioners who want to ship working scripts, not just read about them. New users get a significant discount on their first subscription.
Explore DataCamp Courses →Where to go next
The Yoast meta snippet is one of the highest-leverage things you can install on a WordPress site that runs any kind of AI or automation. Once it is active, the rest of the workflow falls into place:
- How to Connect WordPress to Claude (or Any AI) via REST API — the auth setup that the meta-write POST in this post depends on (Application Password, HTTP Basic Auth, the Cloudflare User-Agent fix).
- Automate Your Yoast Meta Description (REST API + Code Snippets) — the spoke that uses this snippet to write meta description, focus keyword, and additional keyphrases at scale, with full Python examples.
- How I Fixed 1,000+ SEO Issues in 3 Hours Using Claude + WordPress API — the case study that bundles auth, this snippet, and a full audit-fix workflow into a single session.
- The Claude Skill That Automates WordPress Publishing — the skill that packages this snippet’s REST writes into a single command-line call, so future posts publish themselves with Yoast meta included.
The take-home
The Code Snippets plugin removes the only honest reason most WordPress site owners avoid custom PHP: the fear of taking the site down. Validation plus auto-deactivation makes a broken snippet a non-event. Once you trust that safety net, a single 22-line snippet unlocks the Yoast meta REST API, and the slowest part of the writing workflow — clicking through the meta box on every post — becomes a single field in your POST payload.
Install Code Snippets once, paste the snippet once, and every blog post you publish from there on can have its Yoast meta description, focus keyword, additional keyphrases, and SEO title written from a script. That is the whole unlock.
— Lukas